
Bottom line: Permissions decide who on your team can see and do what. Admins can do everything. Everyone else gets access through groups you build, so you grant each role exactly what it needs and nothing more. You manage all of it in the Console under Employees.
The model: three independent settings
Access in Fleet Chaser is controlled by three things you set per teammate. Get these right, and you are done.
- Platform access — where a person can log in: the Console (web), the Employee App (mobile), or no access. At least one is required for an active teammate.
- Admin status — an Admin automatically has every permission. Use it sparingly.
- Groups — for everyone who is not an Admin, all access is determined by the groups they belong to. Someone in two groups gets the combined access of both.
Admins vs. regular team members
- Admin — full access to every feature and setting, including company settings and managing other admins. An Admin badge shows next to their name in the team list. Treat it like a master key: give it only to owners and trusted managers.
- Regular team member — starts with no permissions and sees only what their groups allow—the right default for dispatchers, drivers, mechanics, and office staff.
You set Admin status and platform access on a teammate's profile. Open Employees and select a person, or use Create Employee to add someone new and assign their groups and platform access in one step.
Groups: where you shape access
A group is a reusable role — for example, "Drivers", "Office", "Mechanics", or "Owner". Open Employees → Groups, then create a group using Create Employee Group, and configure its three tabs: Employees, Visibility, and Permissions. Change a group once, and it updates everyone in it instantly.
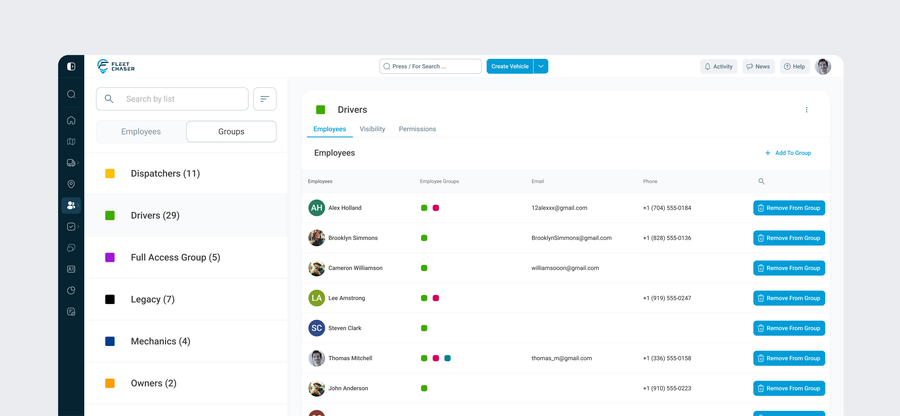
Employees → Groups: your list of roles, the Create Employee Group button, and a group's three tabs — Employees, Visibility, Permissions.
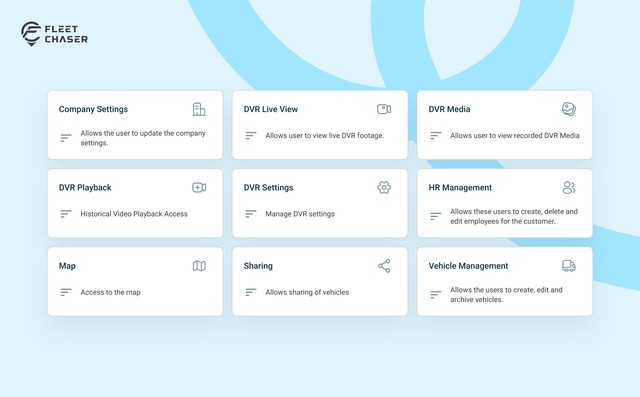
The permissions you can grant
On a group's Permissions tab, you toggle these on or off. Turn on only what the role needs.
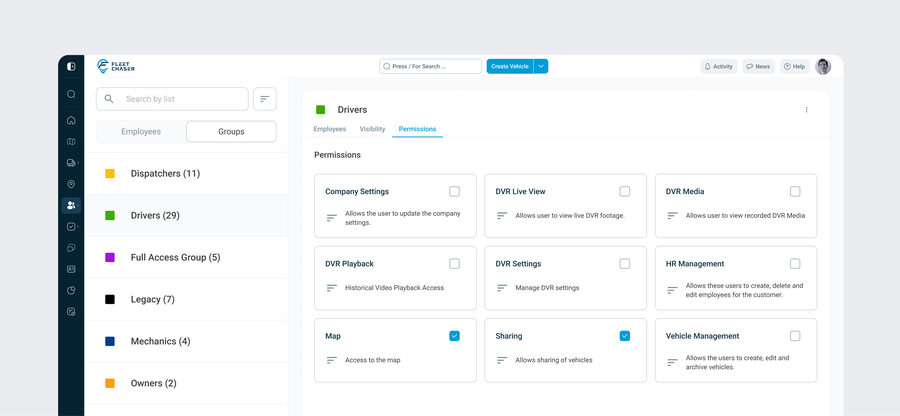
A group's Permissions tab. Each card represents one capability, with a description and an on/off checkbox.
- Map — access to the live Map.
- Vehicle Management — create, edit, and archive vehicles.
- HR Management — create, edit, and remove team members.
- Company Settings — update the company's settings.
- Sharing — share vehicles via Live Share links.
- DVR Live View — watch the live camera feed.
- DVR Media — view recorded camera media (clips and snapshots).
- DVR Playback — request historical video playback.
- DVR Settings — manage camera and DVR settings.
Company-wide administrative actions, such as managing other admins, are covered by Admin status rather than a per-group toggle.
Visibility: scope what a group can see
The Visibility tab controls which vehicles a group's members can see. Leave it on "All vehicles", or limit a group to specific vehicles so a regional dispatcher only sees their own trucks.
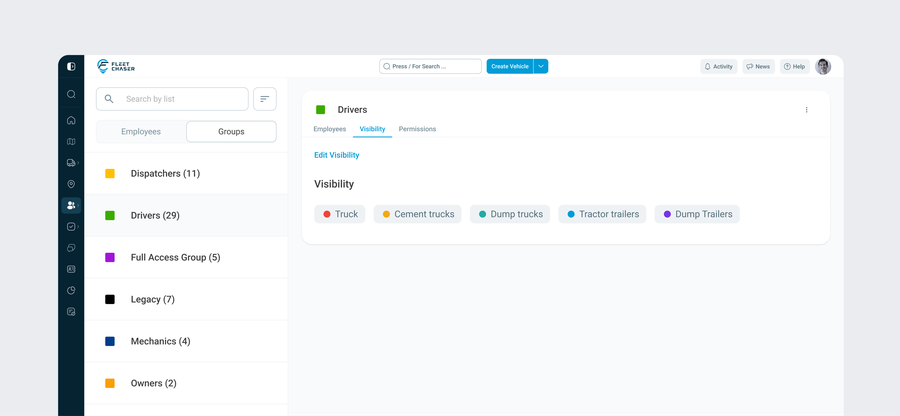
A group's Visibility tab. Use Edit Visibility to limit members to specific vehicles rather than the entire fleet.
Set it up, step by step
- Go to Employees.
- Open the Groups tab and click Create Employee Group (for example, "Dispatchers").
- In Permissions, enable the actions this role needs.
- On Visibility, pick which vehicles the group can see.
- On Employees, use Add to group to add the right people.
- To add someone new, use Create Employee, set their platform access (Console or Employee App), and assign their groups.
- To give someone full access instead, mark them as an Admin on their profile. No group is needed.
What teammates see without permissions
Fleet Chaser hides what a person cannot use, so the app stays clean:
- Menu items disappear. No Map permission means no Map in the sidebar; no camera access hides Cameras.
- Restricted areas show a short "no access" message instead of the feature.
- If they reach a blocked action directly, they get a "You don't have permission to perform this action" notice.
Common setups
- Driver / field — Employee App access only, minimal or no Console permissions.
- Dispatcher — Map, Vehicle Management, and Sharing; Visibility limited to their region.
- Mechanic — Map and Vehicle Management; Visibility scoped to the vehicles they service.
- Office / viewer — Map with read-only visibility, no edit permissions.
- Owner / manager — broad permissions, or Admin if they also manage the team and company settings.
Tips
- Prefer groups over Admin. Groups keep access tight and easy to audit.
- Build roles once and reuse them. Adding a new hire becomes a one-click assignment.
- Review your Admins periodically. Every Admin can see and change everything.
- Use Visibility to scope large fleets by region, site, or team.