
A new truck usually shows up before its tracker does. Until now that was awkward: the form wanted a make, model and year before it would save, and a vehicle created without a tracker stayed that way, because the Console had no place to add one later.
This release changes the order. You add the vehicle first, in one short form, and connect its tracker or camera whenever it is installed, from a new Hardware tab on the vehicle page. The same page now also lets the office check a driver out.
Add the vehicle first
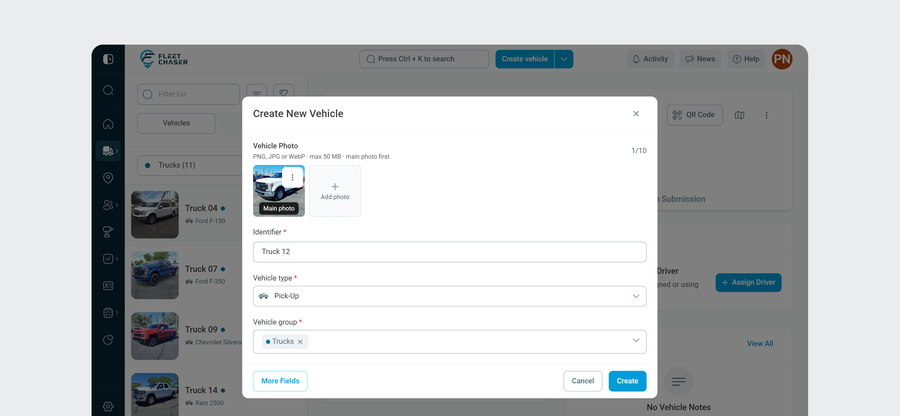
On the Vehicles page, click Create vehicle at the top. Create New Vehicle asks for three things: an Identifier, a Vehicle type and at least one Vehicle group. The details are optional and sit behind More Fields: VIN, make, model, year, odometer and engine hours. A vehicle without a tracker keeps the odometer and engine hours you type and shows them on its Overview; if a tracker is added later, its readings start from there.
Photos moved into the same form. Click Add photo to add up to ten, choose the lead one with Make main photo, and delete the ones you do not want. That replaces the old Photos tab. Every existing photo is still there, in Edit Vehicle and in the photo viewer on the vehicle page.
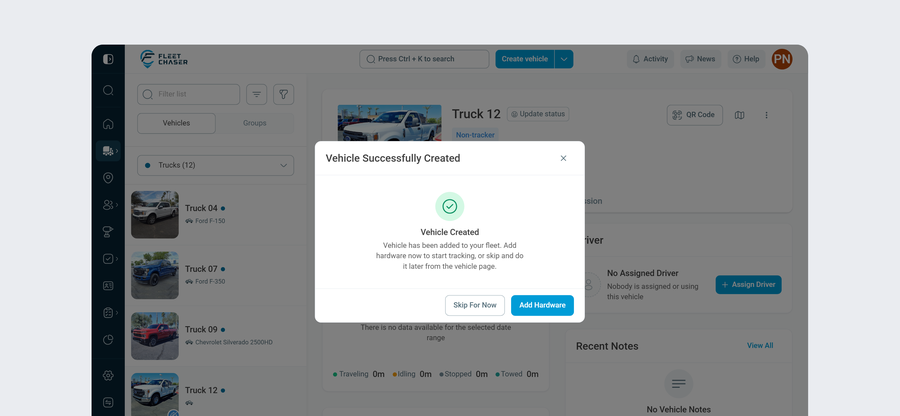
Click Create and the new vehicle's page opens with a Vehicle Successfully Created prompt. Choose Add Hardware to connect a tracker or camera now, or Skip For Now to do it later from the vehicle page.
Every device on one tab
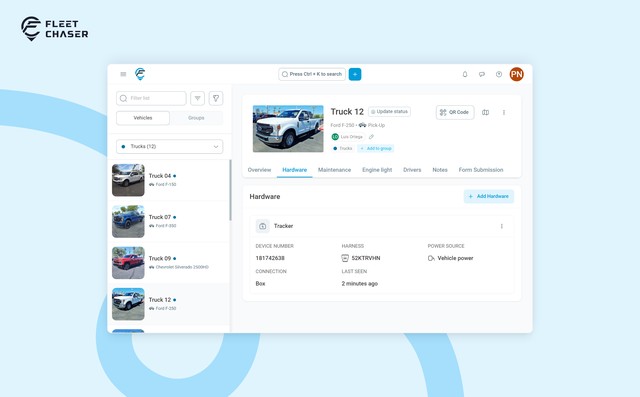
The Hardware tab sits next to Overview and replaces the old hardware card there. With nothing installed it shows Hardware Not Assigned and an Add Hardware button, which opens the same dialog as the prompt.
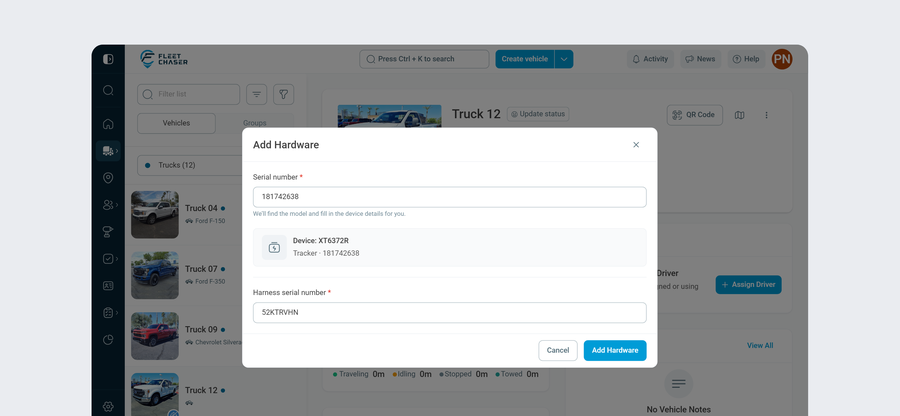
In Add Hardware, type the device's serial number and pick it from the suggestions, or, on a phone, tap the barcode icon in the field to scan it. Fleet Chaser finds the model and fills in the details. A tracker that needs a harness then asks for the Harness serial number, which you can scan too, and checks it as you type. For a Fleet Chaser camera, the dialog shows its audio, timezone and Wi-Fi settings instead, then its channels, preset for the model. Check which way each lens points, such as Road or Cab, so recordings are labeled correctly. Click Add Hardware to finish.
The device then gets its own card on the tab. The Tracker card shows the device number, harness, power source, connection and when it was last seen. Until a newly added tracker sends its first reading, the truck shows Pending in the map's vehicle list. The Camera card shows the channels in use and whether the camera is online. A vehicle can have one tracker and one camera; once either is on, Add Hardware sits at the top of the tab for the other.
Each card's menu has Unassign and Swap, which opens the same dialog, titled Swap Device, to replace the device in one step. Unassigning a tracker keeps the vehicle's last odometer and engine hours, so the readings do not start over.
Who has the truck right now
The Driver card on the vehicle's Overview has been rebuilt. When a driver is checked in after their pre-trip, the card shows who it is and since when. Its menu now has Check out current driver, at the date and time you pick, for the trip that ended without a post-trip. The same check-in shows the driver on the vehicle lists, on the map and in History, and a vehicle that is driving with nobody checked in is flagged.
If a driver has been checked in for 24 hours or more, the card says it may be a long job or a forgotten post-trip, with a Check Out Driver link next to the warning. You can dismiss it for 24 hours in your browser.
Assigning a driver is quicker too. The list now includes people assigned to other vehicles; pick one, confirm, and they move over.
Also new in the Console
- Locations, rebuilt around the map. The list sits beside a full-height map, a location opens in its own panel with Details, Vehicles and History, and KML or KMZ site plans draw on the location's map.
- Events, rebuilt. Search, filter and sort your events, switch between cards and a table on a large screen, and open each one on its own page.
- Every form answer in one table. A form's Submissions tab shows a row per submission and a column per question, and a question keeps its column across versions of the form as long as its wording stays the same.
- Voice messages in Chat. Record, play back and send a voice message from the Console.
- Office files open in the viewer. New Word, Excel, PowerPoint and CSV files open as a readable PDF wherever you open a file.
The full lists are in the release notes for November 4 and October 1.
Why it matters
Trucks go into the system the day they arrive, devices are added and swapped by serial number and unassigned as the shop does the work, and the office can see who is still checked in.
Not on Fleet Chaser yet? Start a free trial and we will walk your team through it.
Do I need the tracker before I add a vehicle?
No. A vehicle needs only an identifier, a type and a group. Add the tracker from the Hardware tab whenever it is installed.
Who can add or swap hardware?
Company admins, and employees whose role lets them edit vehicles. Everyone else can see the Hardware tab but cannot change it.
Why can't I find a serial number?
The search lists only the devices Fleet Chaser has put on your account. The serial is on the tracker or its box sticker, labeled S/N, IMEI or ID. If a device is still missing, contact support.
Where did the Photos tab go?
Photos moved into the vehicle form. Choose Edit in the vehicle's menu, or Edit Details on its Overview, to add photos, delete them or change the main one; every existing photo is still there.
Can I still add a legacy DVR?
No. A legacy DVR already on a vehicle keeps working and shows on the Hardware tab, where you can unassign it or swap it for a Fleet Chaser camera. Unassigning the vehicle's tracker also unassigns its legacy DVR, and it cannot be added back.